
Short answer: the music production mistakes that hurt a song most are made before the mix starts: a crowded low end, layering and stacking tracks with no clear job, processing weak sounds instead of replacing them, instruments sitting on top of the vocal, an arrangement that never changes, and working without references or on monitoring you can’t trust. Each one leaves the mix engineer working around a problem instead of improving the song. Not sure which one is holding your track back? Send it for a free review and an engineer will tell you.
These are the mistakes I see most often in the sessions artists and producers send us for mixing and mastering. None of them is about talent. They are habits, and every one of them is cheaper to fix in the production than in the mix.
The general rule behind all of them: a low-quality part does not turn into a high-quality part because it gets mixed, sits next to better sounds, or belongs to a great song idea. Every stage only works with what the previous stage delivered. Knowing some music theory and the basics of arrangement helps, but most of the problems below are about decisions, not knowledge.
The 11 most common music production mistakes at a glance
| Mistake | What it does | The fix |
|---|---|---|
| 1. Crowded low end | Bass, kick and other parts fight below ~200 Hz; the mix gets muddy and quieter. | One bass and one kick own the lows; high-pass the rest. |
| 2. Layering for size | Layers mask each other instead of adding up. | Give every layer a job, or delete it. |
| 3. Processing weak sounds | EQ and compression can’t turn a bad sound into a good one. | Replace the sound; keep production processing light. |
| 4. Cheap samples | Parts never match the reference, whatever you do to them. | Use well-recorded libraries and one-shots. |
| 5. Crowded vocal range | Instruments mask the vocal; EQ cuts damage both. | Arrange around the vocal: different register or rhythm. |
| 6. Too many tracks | Duplicates and dead layers; slower, messier mixes. | Consolidate and delete before you export. |
| 7. Static arrangement | Every section sounds the same, so nothing lands. | Add and remove parts; use transitions. |
| 8. Processed drum loops | Baked-in sound you can’t rebalance in the mix. | One-shots for kick, snare, hats; loops on top. |
| 9. Unreliable monitoring | You can’t hear low-end and masking problems. | Decent monitors or headphones, plus references. |
| 10. Messy session | Unnamed, uncoloured tracks; mistakes in the mix. | Name, colour and group tracks as you go. |
| 11. No reference tracks | Ears drift and the whole team aims at different targets. | Pick references early and keep them to the master. |
The first three are the ones we run into most in the sessions we receive. Each is explained below with what to do instead.
Mistake #1: a crowded low end (poor bass management)
 The most common production mistake is not giving each element its own space in the low frequencies. It happens so often that it sneaks into big commercial projects too.
What poor bass management looks like
Several instruments share the same fundamental range at the same time: a bass line, plus a low piano part, a cello, a pad or a second synth bass. They fight each other. The usual reaction is to carve EQ cuts into some or all of them so they “sit”, but when two parts really occupy the same notes in the same range, those cuts damage the sound of both.
An overloaded low end sounds muddy, eats headroom so the track ends up quieter at the same peak level, and gives the mix engineer a rescue job instead of a mix. The better approach is not to create the conflict in the first place.
Layering in the bass range
Layering kicks is common and often works, because a second layer can add a click or body the first one lacks. Layering two full bass sounds in the same range is different: the two waveforms interact, some notes come out louder and others quieter, and the low end becomes unstable. If you do layer basses, split them by band, for example a clean sub under a distorted mid-bass, so they don’t overlap.
How to manage bass frequencies
Keep one bass and one kick in the low range. Ideally they live in slightly different bands (a kick with its weight around a short punch, a bass with a longer sustain), and where they do overlap, sidechain the bass to the kick so they take turns. Make sure the other accompaniment parts stay out of that range. Our guide to mixing low end goes deeper into the mix side.
Mistake #2: layering for the sake of it
 Layering is a good tool when it is used on purpose. A professional adds as few layers as possible and knows exactly what each one brings: attack, body, air, width.
The beginner version is stacking more and more layers on a piano, a synth or a vocal in the hope of a huge sound. What comes out is usually a pile of sounds rather than one big sound, because the layers mask each other. Layering several weak sounds also doesn’t create one strong sound. Fewer layers of better sounds almost always win, and a sound that doesn’t need layering at all is better still.
A quick test: mute each layer in turn. If you can’t hear what changed, the layer has no job.
Mistake #3: processing sounds to fix them during production
If the sounds you picked aren’t what you wanted and you’re trying to make them right with a lot of EQ and compression, the processing won’t save them. Equalisation and compression shape a sound; they don’t raise its quality.
Choose instruments that already sound close to what you want, especially the parts that carry the song: kick, snare, the main melodic instrument and anything that carries the hook. Those need to be right from the start.
Not all processing during production is a problem. Light, general moves that are part of the sound design (a bit brighter, a bit wetter) are fine. What causes trouble is heavy corrective processing printed into the audio before the arrangement is finished. When parts arrive without heavy processing baked in, the mix engineer has room to do what the whole mix needs. If you do print effects, keep the dry version too.
Mistake #4: using cheap sounds
 How do you know a sound is “cheap”? Two signs. It needs heavy processing to become merely acceptable (see mistake #3), or, with no processing on it, it sounds very different from the equivalent part in your reference track.
Processing won’t rescue those sounds, so swap them. Look at which libraries and instruments producers in your genre actually use. Well-recorded libraries give you parts that sound finished before anyone touches them. If you use samples from other people’s records, that is a different problem: read our guide to sampling legally first.
- Usually within one working day
- No card, no obligation
- 11,000+ projects behind the answer
Mistake #5: too much going on in the vocal range
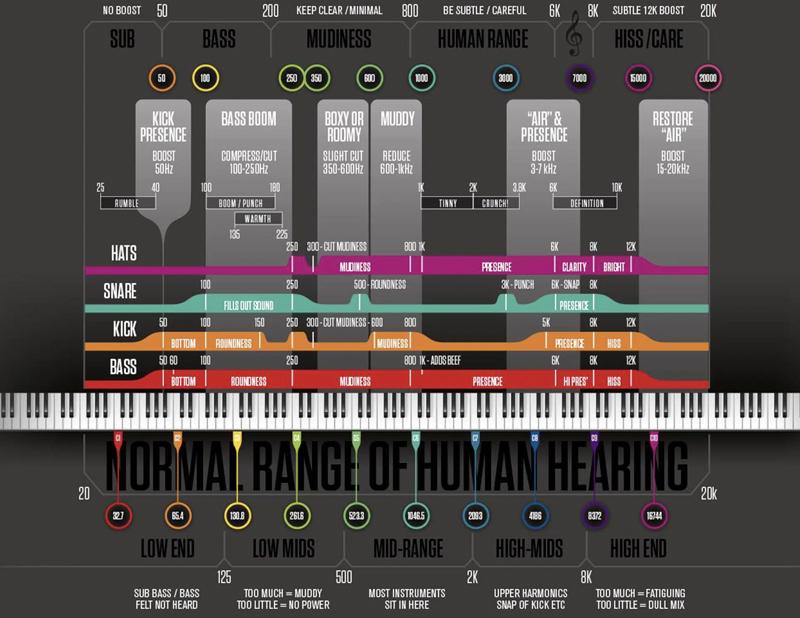 When a piano, guitar or pad plays in the same register as the vocal, it masks the vocal and makes the words hard to follow. The usual fix is cutting the vocal’s frequencies out of the accompaniment, but if the instrument plays the same notes, that cut removes its fundamentals. The instrument ends up damaged and the vocal is still masked.
It’s a simple mistake, and a very common one. The fix is in the arrangement: at any given moment, keep the accompaniment in a different register from the vocal, or have it play when the vocal rests. Taken together, the vocal and the instruments should still cover the whole spectrum, shaped the way your genre expects. They just shouldn’t pile into the same frequencies at the same time.
Mistake #6: using too many tracks
Large track counts are normal when a song has an orchestra, big vocal stacks or a live band. The mistake is a simple song arriving with a hundred-plus tracks: duplicated parts, abandoned ideas left unmuted, every take kept, a new instrument for every section.
Too many tracks creates extra work for you, for the engineer and for everyone else on the project, and dead layers still add noise and masking. Keep the session organised and as lean as the song allows. A modern song can be built from a short list: kick, snare, percussion, bass, one or two main instruments, effects, lead vocal, backing vocals and ad-libs. Look at most chart records and you won’t find a hundred different synths.
Before you export for mixing, delete what isn’t playing, consolidate parts that are really one part, and print the final choice of each. Our guide to preparing a multitrack session walks through it.
Mistake #7: an arrangement that never changes
This sounds like it contradicts mistake #6, but it doesn’t. Lean doesn’t mean static. The mistake here is an arrangement that stays the same from the first bar to the last: the same kick, snare and piano pattern under every section, no movement, no contrast.
Music has to move. Listeners need something to change between the verse and the chorus, a fill or a transition that tells them a new section is coming, and parts that enter and leave.
How to fix a static arrangement
- Give each section something of its own: a part that only plays in the chorus, or a part that drops out in the verse.
- Take things away before the chorus, not only add to it. Contrast is what makes a drop or a chorus hit.
- Use risers, downlifters, reverse effects and fills between sections.
- Work with the stereo field: a narrower verse makes a wider chorus feel bigger.
- Add small details (a counter-melody, an ad-lib, a percussion change) rather than whole new layers.
From our practice
When a song comes to us for mixing with a flat, unchanging arrangement, the biggest improvement usually comes from small production touches, not from the mix: a few effects, a transition, a part that enters in the second chorus. That is why we also offer music production for songs that need it before the mix.
Mistake #8: building the beat on processed drum loops
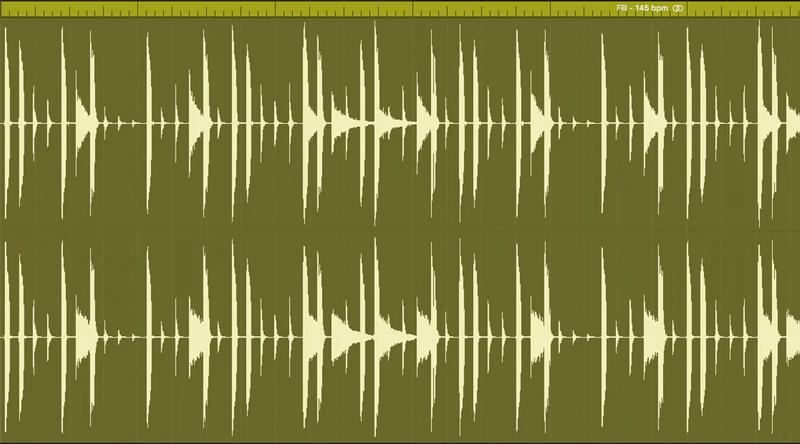 Many drum loops come with heavy processing already printed into them, and the quality varies a lot from pack to pack. The bigger problem is flexibility: once kick, snare and hats are glued together in one stereo file, you can’t rebalance them, change one sound, or process each one for the mix.
Use a full loop only when it already sounds exactly the way you want. Otherwise build the core of the beat from one-shots, so each drum can be changed and mixed on its own.
How to use drum loops without the downside
Program your own kick, snare and hats from good one-shots. Then put a percussion or top loop on top for movement and groove, with its low end filtered out so it doesn’t fight the kick. You get the feel of the loop and keep control of the drums that matter.
Mistake #9: producing on monitoring you can’t trust
Talented producers sometimes write great songs on cheap earbuds, with no speakers, or with monitors set up badly in an untreated room. You can argue that a producer doesn’t need to be a mixing expert, and that is partly true. But in my experience the best-sounding productions come from producers who can hear what they’re doing: they pick better sounds and write arrangements without hidden frequency conflicts, because they can hear the conflicts.
You don’t need an expensive studio. A decent pair of monitors or studio headphones you know well, checked against reference tracks, and a second check on a phone or in the car will catch most low-end and masking problems. Our guide to mixing on headphones covers what headphones can and can’t tell you.
Mistake #10: a disorganised session
Tracks called “Audio 14” or “track 42” are annoying for you when you come back to the song a month later. For anyone else, such as the mix engineer, they slow everything down and make mistakes more likely: a muted double, a missing ad-lib, the wrong take.
Build the habit from day one: name tracks by what they are, colour them by group (drums, bass, music, vocals, effects), and keep related tracks together. In the middle of a creative session quick, messy naming is fine. Just clean it up before the session leaves your computer. The difference between stems and multitracks matters here too, because engineers usually want individual tracks, not groups.
Mistake #11: not using reference tracks
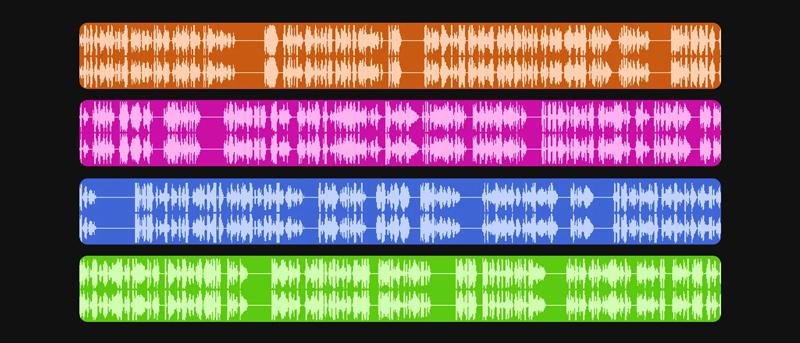 Originality matters, and that can make references feel like copying. They aren’t. A reference tells you whether your sound selection, balance and low end are in the same league as released records in your genre. It is a level check, not a template.
In my practice, projects that pick references at the start and keep them through to mastering get the best results. Several people usually work on a song: producer, recording engineer, mixing and mastering engineers. When everyone hears the song against the same references, everyone pushes it in the same direction.
So pick two or three references while you’re building the main elements of the song, compare against them often at matched loudness (louder always sounds better, so level-match before you judge), and send them with your files when the song goes to mixing.
Mistakes that show up when you send the song for mixing or mastering
A few mistakes only appear at the handoff, and they cost time on every project:
- Processing left on the master bus. Export stems for mixing, or the mix for mastering, with no limiter, clipper or “mastering chain” on the master bus. For mastering, a mix that peaks around −6 dB leaves the mastering engineer room to work. More on that in how loud a mix should be before mastering.
- Clipped or distorted recordings. Clipping can’t be undone in the mix. When you record, leave headroom (peaks around −12 dBFS are a safe habit at 24-bit).
- Stems that don’t line up. Every file should start at the same point, bar 1 or 0:00, at the session’s sample rate, as 24-bit WAV.
- Chasing a loudness number. There is no LUFS value a master has to hit. −14 LUFS is the level Spotify plays tracks back at, not a target; a lot of pop is mastered around −9 LUFS, and released records range widely. The target is a master that sounds right for the song. See how loud a master should be.
- Mixing while still producing. Keep a rough balance so you can hear the song, but leave the real mix until the arrangement is locked. Otherwise every change in the arrangement undoes the mix.
How to check your own track for these mistakes
- Solo the low end (or put an EQ that cuts everything above ~150 Hz on the master bus for a moment). Can you count which parts are playing down there? It should be one or two.
- Mute each layer and each non-essential track in turn. If nothing obvious changes, delete it.
- Listen to the vocal with the music at its normal level. Can you follow every word without straining?
- Skip from the verse to the chorus. Does something clearly change?
- Compare against a reference at matched loudness, then on a phone speaker.
- Open the session as if you were someone else. Would you know what every track is?
If you’ve done all of this and the track still doesn’t sound like the records you love, it’s often something you can’t hear any more after weeks with the song. That is where a second pair of ears helps.
How we help you fix production mistakes
General tips only go so far. Often a producer knows the song is good but can’t put a finger on what the chart records have that their track doesn’t. What helps then is specific feedback on this song.
That is what our free track review is for: send the mix you’re stuck on and an engineer listens and writes back with what is holding it back and how to fix it. It’s free, with no order and no card. And when we mix your song, we flag production problems we hear in the session before we start, so they get fixed where they belong instead of being hidden in the mix.
When the track is ready for the final stage, an engineer can take it from raw multitracks to a finished master from $133 per song, 2–3 days per song, 6 revision rounds included. See all prices for the other services.
Production mistakes FAQ
What is the most common music production mistake?
A crowded low end: several parts playing in the same bass range at the same time. It makes the whole mix muddy and quieter, and EQ at the mix stage can’t fully separate sounds that were never given their own space. Keep one bass and one kick in the lows and high-pass the rest.
What mistakes do new music producers make?
The usual ones are stacking layers to make things sound bigger, trying to fix weak sounds with processing, using too many tracks, writing an arrangement that never changes, and judging the track on monitoring they can’t trust without any reference tracks. All of them are habits, so they’re cheap to change once you notice them.
Is layering always bad?
No. Layering with a purpose is a core technique, for example a kick with a separate click layer, or a clean sub under a distorted mid-bass. The mistake is layering to make something bigger without deciding what each layer adds. Two sounds doing the same job in the same range mask each other more than they add up.
Should I process sounds while producing?
Lightly. Processing that is part of the sound design belongs in the production. Heavy corrective EQ and compression to rescue a weak sound doesn’t work; replace the sound instead. If you print effects, keep the dry version so the mix engineer has a choice.
How loud should I record?
Leave headroom. Peaks around −12 dBFS while tracking are a safe habit at 24-bit: there is no benefit to recording hotter, and clipped audio can’t be repaired. Loudness comes at mastering, not at recording.
What mistakes should I avoid before sending a song for mixing or mastering?
Turn off processing on the master bus, export every track from the same start point as 24-bit WAV at the session’s sample rate, name the files clearly, and include a reference track. For mastering, send the mix with no limiter on it and peaks around −6 dB.
How do I know if my production has problems?
Compare it against a released reference at matched loudness, then listen on a phone speaker and in mono. Those checks expose low-end problems, masking and missing midrange quickly. If you still can’t tell, a free track review gets you an engineer’s notes on your specific song.
Can mixing fix production mistakes?
Partly. A good mix can hide some problems, but it can’t change a weak sound into a strong one, separate two parts playing the same notes, or add contrast to an arrangement that doesn’t have it. Those fixes belong in the production, which is why we point them out before we mix.
Before the mix: the part that is yours. Most of what a mix spends its time fixing was decided long before the session reached us — sound selection, arrangement, the way things were recorded. When those decisions stop repeating the same mistakes, the record is better before anyone touches it, and so is what we can do with it. That is what our production course is: 21 modules on the decisions that get made before the mix, taken from eleven thousand client sessions.
Send us a song you are working on
A rough demo is fine — it does not need to be mixed. Max Rayden or Ivan Taiga listens on studio monitors and writes back exactly what is holding the track back, and what to do about it.
- Usually within one working day
- No card, no obligation
- 11,000+ projects behind the answer
Order Complete Mixing and Mastering What it includes All prices