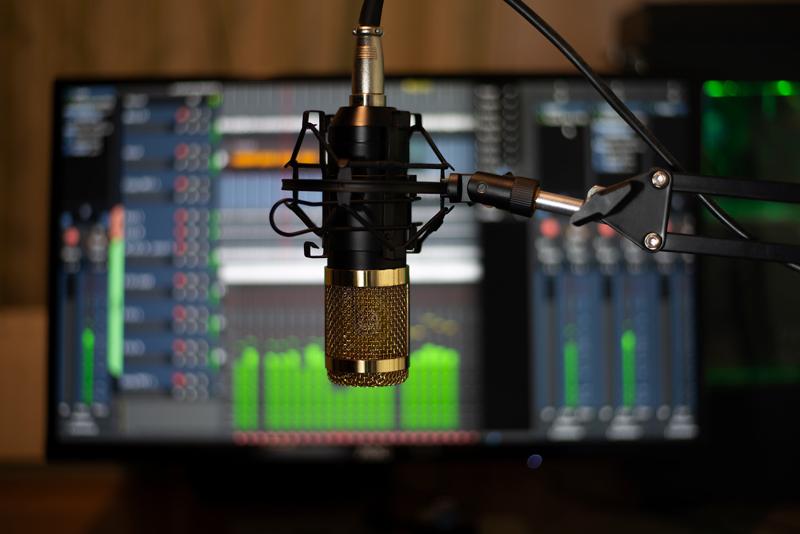
In this article, we’ll share with you mastering tips. These guidelines given by an experienced mastering engineer are proved by many years of working on top industry projects.
Who will benefit from reading these mastering tips
These tips are not for experienced audio engineers, not for professionals, because professionals already know all we are going to say here and much more.
This article will come in handy for people who are not professional audio engineers, it will help artists, producers, and beginners in mastering.
Maybe you are producing songs yourself, and also do mixing and mastering. Then read our tips, they will guide you through mastering your project.
 Why is mastering so hard?
Mastering is hard because it’s the final quality control of the song. The mastering engineer should be able to correctly analyze the song, determine the mistakes if there are any, and bring the song to perfection. He or she must be an expert in the music industry, perfectly know its modern trends and requirements.
Who is a mastering engineer?
A mastering engineer is responsible for ensuring the quality of the master record and its parameters. Additionally, at this final stage of song production, the engineer checks the mix for any mistakes or shortcomings.
The mastering engineer has the last word, this means that he or she must be a highly qualified and experienced specialist so that you will be able to trust their musical judgment. It’s not beneficial at all when mastering is done by a person who is not professional.
Why is it better to order professional mastering?
Wait, what’s happening? We’re about to share powerful mastering tips to help you create a great master record by yourself. But before we dive into that, why are we trying to talk you out of doing mastering? Isn’t that a bit strange? Not at all!
The thing is, mastering is the quality control for the record. It must bring the record to the industry level by all the parameters. It makes the record ready for release. It does so much, but at the same time, professional mastering is not at all expensive. It’s easy to find offers for high-quality mastering for as much as $30-$50. The most famous engineers may charge more, but it still will be less than $200, and high prices for mastering are extremely rare.
 Considering how important it is for a song, $50 for mastering is a perfect investment. All we want is for you to think twice before rushing into preparing your songs for release yourself.
If it’s about the money, and you are on an extremely tight budget, then master the mix yourself, but at least get a professional look at it afterward.
Ask the engineer to check your master record and point out mistakes if there are any. At least this way you will check the master record with a professional and get their opinion if it is ready for release, and it will cost you less than ordering mastering.
If you decided to order professional mastering, we invite you to contact us at our Major Mixing studio, write to us online, we’ll prepare your song for release exactly as it is required by the music industry today because this is our specialty, this is what we do.
If you still would like to try and master yourself, then read the following tips from our professional engineers, they will help you to do mastering well.
What’s great about our mastering tips?
Every mastering engineer has their preferable way they do mastering and their favorite signal chain (sequence of plugins applied to master a mix). In this article, we share with you our preferences and how we usually perform mastering in our Major Mixing studio.
Another engineer may have a different approach and use mastering plugins a bit differently. It doesn’t necessarily mean that one is right and the other is wrong, or that one is a better specialist than the other. In mastering what matters is bringing the song’s sound to the highest industry standard, and there may be several different ways to achieve this result.
The tips you will see in this article come from our experience of working with top projects, and from many years of mastering. That’s why, you can trust these tips, and they definitely can help you.
Tip #1 Use high-quality monitors
The audio engineer first checks the track and then creates the final master. Neither the first nor the second can be done without the perfect frequency response of professional-level speakers.
Working without the needed monitoring loses the very sense of mastering because it is supposed to bring the song to the highest quality of sound, which you will not be able to do without high-quality equipment.
The engineer should be able to correctly hear the frequency spectrum of the song, from the sub-bass to the highest sounds.
Therefore, mastering should be done only using high-end equipment. This final stage of music production can not be done using cheap or consumer-level monitors.
Of course, having a professional studio with top-notch monitors is ideal—no question about that—but not everyone can afford it. The good news is, technology has made it easier to achieve high-quality monitoring without owning a studio that costs a fortune.
If you don’t have a perfect studio, here’s the workaround: get a pair of professional headphones—think $400 or more. Use SoundID Reference by Sonarworks to calibrate them, so the frequency response is flat and you hear exactly what’s in your mix. Then add Waves NX to simulate a proper studio environment. Together, these three tools can give you a reliable monitoring setup. It’s not the same as a fully equipped pro studio, but it’ll get the job done.
Another option is to rent a professional studio for an hour, listen to your mix, take notes, and tweak it later.
Mastering demands the best monitoring—make this a priority.
Tip #2 Choose a reference track

We oftern hear from our clients that they want to create a unique sound, so they assume they don’t need references. But this is a mistake.
It’s wonderful that you are aiming for something unique, but mastering is standardization. You’re making your mix meet industry standards, and that’s where reference tracks come in. They’re essential.
Often, more than one reference track is selected. You’ll need to compare them to the sound you are working on.
Your reference track should have the following properties:
- Belong to the top-chart level of songs
- Be recent, ideally, released within the last couple of years
- Belong to the same genre as your music, be similar to the sound you’d like to achieve
Stick to the reference track and check your work against it from time to time.
Your ear should not get used to the mix you are working with, it must be tuned to the best industry tracks, to the reference tracks.
Tip #3 Research the industry
 First of all, before you apply any mastering plugins to the song, you need to do some homework.
Want a free test mix of your track?
We get it.
That’s why we’ll do a full hybrid (analog + digital) mix of your song —
for free.
No upfront payment. No risk.
You only pay if you’re blown away. And if you are, we’ll slash 40% off the final price.
Nobody else in mixing and mastering offers this.
Why?
Because most studios say yes to every project. We don’t. We only mix what we’re excited about — so send us your best track. If we like it, we’ll mix it like it’s going to the Grammys.
👉 Just drop your name and email to get started.
Take the top 100 billboard or current top 100 Spotify tracks and check their parameters. You’ll need to measure the following parameters of the top songs:
- LUFS
- RMS
- Dynamic range
- Frequency response
You may organize it in a chart if you’d like. You may also add other parameters of the sound to the chart.
You also may calculate the average numbers for each parameter, so you’ll see what to aim for while mastering.
Best mastering engineers do such research at least twice a year.
So, you see, there is nothing random in mastering. The right way to do mixing or, especially, mastering is by knowing the result you want to achieve and knowing the way to achieve it. During mastering, you know exactly what you are doing to the sound, and why you are doing it. Otherwise, you’ll end up stacking plugins one upon another, over-processing, ending up without the result, and destroying the mix.
Tip #4 Listen to your mix
You have determined the parameters the industry requires from your song. Now’s the time to see where the mix is placed regarding these measures. Give your ears some time to rest and then listen to your track and analyze it.
Return to mixing to correct the mistakes
Maybe it’s not as bright as the top tracks, maybe it’s quieter than needed, and so on. And for everything that needs correction in your track now you have to determine if it is a mixing issue or not. Talking from the experience, 90% of track issues that are found by a mastering engineer require fixing on the mixing level. So, if you see such faults, you just come back to mixing and fix the issues you have discovered. Or, if you are not the one who mixes this track, you give recommendations to the artist or the mixing engineer on what to improve in the mix.
Get a good idea of what needs to be improved in your song
Now, when you have fixed all the mixing shortcomings, the mastering process begins.
You should measure all the loudness parameters and frequency response of the song. Compare the results to the industry standards and to your reference tracks. That’s how you know what your mastering should improve in the song. It’s time to start adding plugins to the mastering bus.
So now we’ll start describing to you the mastering process itself and what mastering signal chain we advise you to use.
Tip #5 Apply equalization
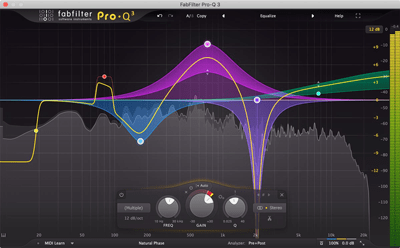 And the first one will be the EQ. With it, you’ll correct the frequency response of your track. If your mix is too dark, too bright, or has other inconsistencies, the EQ will correct that.
The first rule when using equalizer is to choose one of the best, high-quality EQ plugins.
And the second rule is that your equalization should be subtle. It must never be as much as several dB up or down, you need to make the EQ corrections as gentle as possible.
This can be done with the alterations like the following:
- Push the side channel a bit down
- Bring high-end or low-end up
- Bring down a narrow frequency band that is too loud
Usually, certain small frequency bands may be out of balance, it can be caused by the specifics of the monitors the mixing engineer used. For example, some KRK speakers reproduce the band of 3-5kHz a bit louder than the rest of the spectrum. Hence, if a mixing engineer uses them as monitors, this frequency range will be a bit down in the mix in general and will need a small boost.
Tip #6 Reduce dynamic range with compression and saturation
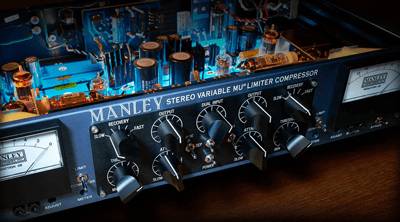 After equalization, we use compression and saturation. First, we use tape saturation to gently round the peaks to add smoothness and slightly compress the sound.
After that, we use master bus compressors. The compressors that are needed here are not just any compressors. For example, R-Vox compressors or R-compressors will not do, nor any other compressor plugins that are better for mixing.
Here we need compressors that are perfect for mastering, such as
- Manley Vari Mu,
- API 2500,
- Fairchild,
- SSL bus compressor
That’s true that the SSL bus compressor was not created for mastering, this compressor gives its specific color to music. However, these days many hits have been prepared for release with the help of the SSL bus compressor, and engineers now tend to use it for mastering.
With the help of compression, we’ll reduce the track’s dynamic range and make it fit modern standards. Today’s hits are not as dynamic as the music used to be, now the difference between the verse and chorus is just slight, and songs are heavily compressed and loud.
That’s why, using any of the compressors mentioned above, you’ll have to work with the dynamics of the mix.
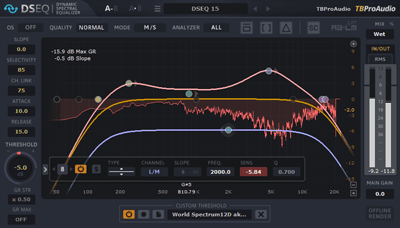 Tip #7 Use De-Harsher plugins
At this step, we smoothen up and clean the sound with the help of AI equalizers like
- Soothe2
- DSEQ
- Gullfoss plugin
Applying these plugins, you will be able to clean up unwanted resonances, smoothen up the harsh parts in the track, and kind of polish the sound.
Tip #8 Apply distortion and soft clipper plugins
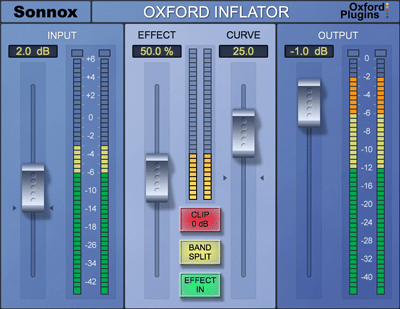 By this time, your track is almost ready. What you’ll need now is to reduce the peaks, even more, using different tools.
You can use compressors with a short attack time, distortion, and soft clippers. The goal is to make sure that there are no peaks that are higher than we can afford them to be. Of course, the maximum level for peaks is when True Peak reaches 0dB. Your peaks must be a bit lower than that.
This task is better solved using several plugins that will little by little tame the remaining peaks until they all are within the normal range. We correct the peaks little by little with a sequence of different plugins. You can use
- LVC Audio Clip Shifter
- Sonnox Inflator
- Plugin Alliance bx Saturator
We use several similar plugins here, each time performing a subtle correction. You can even use the same plugin twice, changing the sound a little each time to cut the peaks more gently.
For example, you can apply LVC Audio Clip Shifter, then Sonnox Inflator two times back to back, and so on.
After we have done these corrections, the mix is very close to the resulting master record.
Tip #9 Finally, use a gentle limiter
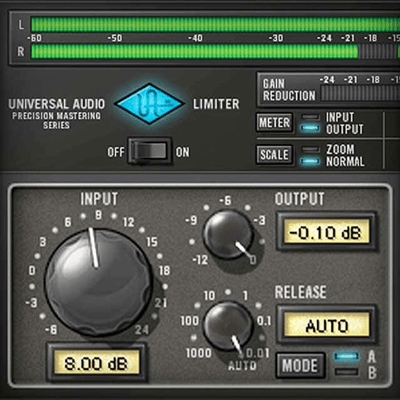 This last limiter you apply must be of exceptional quality. The examples of what we use in our studio for this purpose are:
- UAD Precision Limiter
- A.O.M. Invisible Limiter
- FabFilter Pro-L 2
Usually, this final limiter is set to less than 2-3 dB gain reduction.
There are a lot of plugins in the chain before you come to this step, and the gain staging most often leaves just a little to correct at this point. However, there are rare cases when this last plugin gets a 4-5dB gain reduction. But in any case, the number shouldn’t be more than 6dB gain reduction. But you have to understand that those were more likely exceptions, and usually at this step the gain reduction is set to no more than 3dB.
The output ceiling should be equal to -0,3dB to prevent inter-sample clipping.
Tip #10 Check all the parameters of the master you created
After the mastering is done, we check all the parameters, including loudness, dynamic range, peaks, and frequency response once again.
We often use two or three different meters to measure one parameter. This is because often they use slightly different algorithms and their results differ. So, in this case, getting the average value is quite useful.
All the parameters of the master record now should resemble what we intended in the beginning.
Get professional consulting to check your work
If you are new to mastering and did it yourself without a mastering engineer’s help, you can consider hiring a professional to check the result. You can order consulting from a mastering engineer you know has experience and skills or a good mastering studio.
Consulting will cost less than mastering, and it will be a great benefit for you to know that your music is ready to see the world and is meeting all the industry’s quality standards.
Or, on the other hand, the specialist may find some mistakes in your mastering and will advise you on how to make the master record better. In this case, asking for advice would turn out incredibly helpful.
Nobody needs to release a song that may have no chance of wining because of some mixing or mastering mistakes.
Get help from Major Mixing audio engineers
These days with enormous competition in the music industry, every little detail in your song counts. Only the best music wins, while mistakes made during the song’s production can ruin the project’s future.
If you are not a mastering engineer, it will definitely be preferable to have a professional master your song for you.
We at Major Mixing Studio have spent years perfecting our mixing and mastering skills, working on successful projects, and studying the industry. If in doubt, don’t hesitate to contact us, remember, that the future of your song or your career is at stake here. You want to release only the highest-quality projects, and we’ll be happy to do mastering for you that will match all the winning standards of the music industry.
Want a free test mix of your track?
We get it.
That’s why we’ll do a full hybrid (analog + digital) mix of your song —
for free.
No upfront payment. No risk.
You only pay if you’re blown away. And if you are, we’ll slash 40% off the final price.
Nobody else in mixing and mastering offers this.
Why?
Because most studios say yes to every project. We don’t. We only mix what we’re excited about — so send us your best track. If we like it, we’ll mix it like it’s going to the Grammys.
👉 Just drop your name and email to get started.


