In this article, you’ll find our mixing tips on how to mix a recording of a band performing together. It can be from a recording session or a live concert. The difference between this type of project and the usual song mixing is that the tracks that go to the mix are created simultaneously using microphones that are set in the same room.
At our Major Mixing studio, we often mix and master band recordings and prepare these future hits for release. Keep reading this article, and you’ll be equipped with our practical tips for mixing a live recording to an industry-standard level, giving it a great, impressive, and professional sound.
Why is band mixing difficult
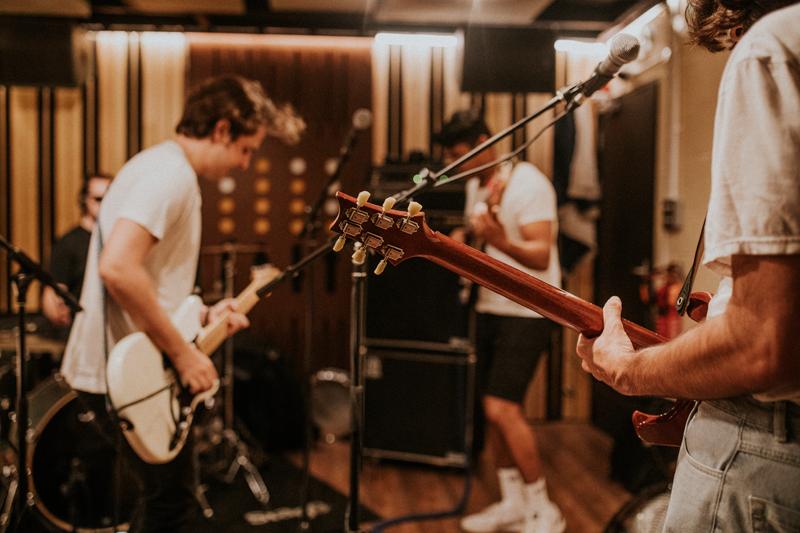 Mixing a live recording is one of the most difficult tasks for a mix engineer. In a usual multitrack of a song, each instrument and each vocal part is recorded separately. On the contrary, in the case of a live performance, all parts are recorded in the same room at the same time, and this is where all the problems and difficulties with live recordings come from.
Bleed
One of the difficulties of mixing a band recording is microphone bleed, spill, or leakage. This means, surrounding instruments’ sounds spill or leak into an instrument’s or an artist’s microphone.
When a performance is captured together, there are microphones set for every music source. Each mic is aimed to record a certain instrumental or vocal part. However, as they all are in the same room, each mic, besides its primary target, also captures the sounds around it, produced by other members of the musical team.
Because of the bleed, in each track in the multitrack, you can hear not only one musical part but, at a different rate, sounds of all other parts as well, and a mix engineer needs to know how to work with them.
Different types of mics setting
Besides mics with spills, there will also be tracks that are especially aimed to contain several instruments and vocals together. For example, room mics, drum overhead mics, and others.
So a mixing engineer in this case has to have knowledge of how to use correctly in the mix room mic tracks and overhead mic tracks, in which instruments sound together.
 Phase problems
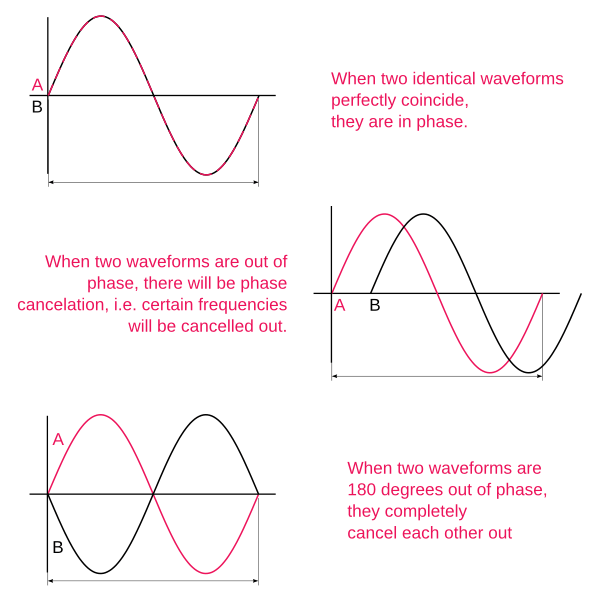
As we described earlier, in a live recording each instrument’s part and each vocal appear in many tracks of the project. But because the distance to the microphones that capture this instrument is different, the sound waves are recorded with a tiny shift in time, which unfortunately can be enough to cause phase problems between the tracks.
These phase problems can result in mild or strong sonic degradation and because of that, the sound of an instrument becomes quieter or damaged in the mix. Sometimes, at an extreme point, this can cause phase cancellation, when an instrument can be heard on both tracks well but completely disappears when the tracks are played together.
These issues related to phase happen because exactly the same sound wave is captured on different recordings, but with a small phase shift.
For example, there are two takes of the same guitar part (maybe it’s a double tracking for the left channel and right channel), if we join these recordings to mono, no issues usually appear. But when you work with two recordings of the exact same performance, you can expect damaging phase interference.
The bottom line: when working with live recording multitracks you have to be prepared for lots of phase interference issues.
The first step in mixing a band: reduce the spill
How do we at Major Mixing usually start mixing band recordings? First, we do editing and preparation of the mixing session, as we need to clean every track from the bleed as much as we can. Often it requires manual work because applying gates and other tools usually turn out not to be very effective in that.
We start cleaning with drums, toms, and others, cutting out the parts between the hits of the drum. Cleaning drum tracks alone makes the whole mix sound much better.
The same cleaning we do with all the instruments – guitars, bass, background vocals, we remove bleed as much as we can.
However, when cleaning, you need to be careful and not go too far. Listen to the music and decide what works best for the song. For example, let’s say the band instruments can be heard too much in the lead vocal part. With this track, when you cut out the places where the singer is silent, the bleed still remains in the parts with the singer’s voice. Too much of this can create an uneven sound of instruments. With the singer’s voice, the accompaniment becomes louder, and in the gaps, it’s quieter, we can say that it’s ducking. A human ear will catch these imperfections, you’ll hear that there’s something wrong with the mix.
That’s why for some recordings it may be better to leave the lead vocal without cutting out the parts when the artist is not singing. Lead vocal will be heavily compressed during mixing, and if we clean it in the gaps, the ducking will become far more obvious after processing is applied.
But in general, we need to make the tracks maximum clean and free from all the extra spill to be able to create the best mix.
 Build a stereo image
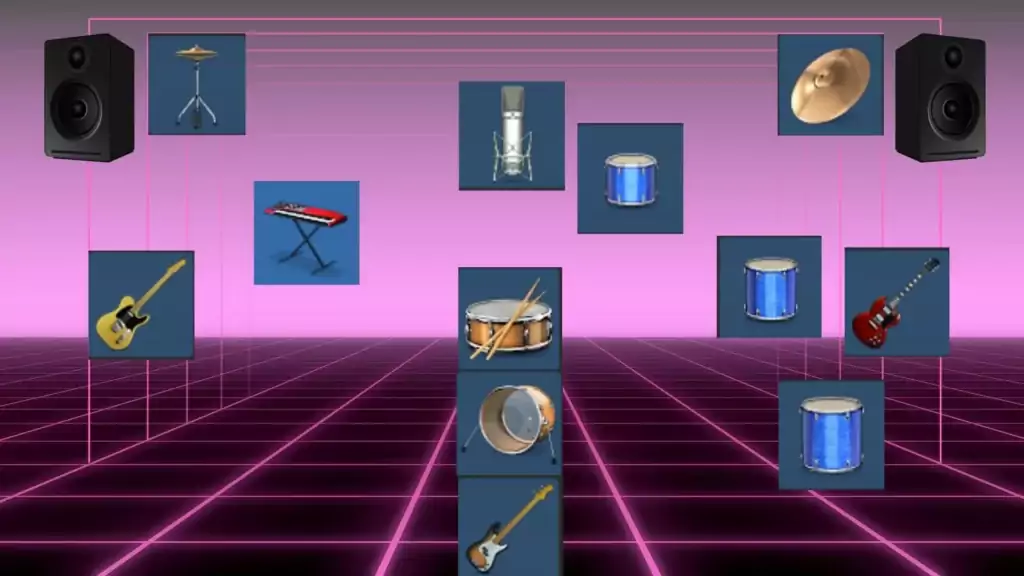
A big portion of the sound in the live recording will come from the room mic. In this mic the instruments and vocals appear in space the same way as they were set on stage for the recording.
So, next, listen carefully to the room mic track and set instruments and vocals in space the same way as they appear in the room mic recording. Learn how they were positioned on the stage.
The same we do with drums and the overhead mic, or drum room mic. We listen to these drum recordings and determine where on stage was each drum. And then we place in the virtual space of our mix toms, hats, and other drums, and do panning accordingly.
Want a free test mix of your track?
We get it.
That’s why we’ll do a full hybrid (analog + digital) mix of your song —
for free.
No upfront payment. No risk.
You only pay if you’re blown away. And if you are, we’ll slash 40% off the final price.
Nobody else in mixing and mastering offers this.
Why?
Because most studios say yes to every project. We don’t. We only mix what we’re excited about — so send us your best track. If we like it, we’ll mix it like it’s going to the Grammys.
👉 Just drop your name and email to get started.
Enhance drums or other parts using triggers
Sometimes, the quality of a drum or another track is not the best in a live recording. It can happen because the mics are usually not the best at concerts, because the instrument was too quiet, other instruments were too loud, or maybe the performer wasn’t playing his best on stage that day.
Then we’d use triggers in mixing if possible. It usually works well if we need to enhance a weak drum sound. We use some additional sounds of instruments, their appearance will be triggered by the original ones. This will enrich the recording and make the quality of the mix better.
Mixing techniques that don’t work for live band recordings
All the tracks of a live recording are connected with each other. Because of that, some approaches that a mix engineer would normally apply while mixing will not work or will not be needed for live band mixing. The most popular of them are timing and pitch correction.
Timing corrections
One mixing instrument that can not be used when mixing a live recording, is timing correction.
Usually, editing a live recording, we can’t move any single track forward or backward in time without ruining the mix. This is because of the bleed, and because the tracks are recorded simultaneously while musicians were performing. These sessions should be left without timing corrections.
Pitch correction
Because of the bleed we usually can not do tuning or pitch corrections for vocals or other tracks.
That’s because we’ll harm other instruments that can be heard in the corrected track.
Besides, the instrument or vocal that’s being corrected will appear in the room mic as well, and after corrections have been applied, it will be dissonant with its spills in other tracks.
Choose reference tracks correctly
The same as for every mixing project, for live band mixing, we use references, this is very important.
However, you need to be very careful with choosing reference tracks for a band performance.
A lot of tracks that you may come across are, in fact, unedited live recordings and are not good to use as reference tracks. Sometimes they may even be recorded with a mobile device. If you choose one of these, you’ll be going the wrong way with your mix and your project will not sound good.
What you need to look for instead, is an award-winning, professionally mixed record, that is similar to the track you are working on. A record which the band recorded playing together, but after that, the multitrack was professionally mixed into a high-quality recording.
The reference track you choose must be successful records, present in billboard charts.
 Dealing with phase issues
The most important issues you’ll need to deal with while mixing a band record are phase problems. Eliminating them is crucial here and if you don’t do it correctly, they will spoil the entire song. Equalizer and other plugins you are going to use for mixing will have no effect if you don’t fix phase problems first.
How to neutralize phase problems
It usually affects lower frequencies, so first of all, we work with drums. We need to check how the tracks sound together and find the optimal position of tracks that is without destructive phase interference. We check the pairs: overhead mic and snare mic, overhead mic and kick mic, room mic and drums, and so on.
What you are looking for in this case is the best sound. If there is any phase interference, you’ll hear flaws in the two tracks played together. You can use your ears, but also you can apply meter plugins for detecting phase problems.
The destructive interference will attenuate some frequencies and the sound will become weaker.
To fix this you’ll simply move the audio of one track by a few milliseconds backward or forward. Moving the track until you find the correct place, where there are no phase problems. You should obtain a complete and powerful sound throughout the frequency spectrum. Sometimes Delay plugin sometimes can help, again, the shift should be by a few milliseconds.
Keep an eye on phase compatibility till the end
Beware that, even though you eliminate all the phase problems at the first step, it can go the wrong way after you have applied some processing to the mix.
For example, equalization and audio compression or other plugins can produce a tiny phase shift and the wave will again be a little out of phase with other tracks.
That’s why you’ll have to check the project for phase coherence during the whole mixing process. Pay the most attention to the low mids and bass.
Mixing drums
When we have finished with spill cleaning and eliminating phase interference, we now have a pretty regular mixing ahead of us. As for applying plugins and joining all the live recording tracks into one coherent mix, this process is similar to mixing any other project. We usually start with mixing drums.
 Kick drum
We use gate plugin on the kick sound first of all.
Then we apply the equalizer, compressor, and other plugins.
The choice of processing tools completely depends on the recording and the qualities of the drum.
The guideline here would be to save the original sound as much as possible and keep the resulting drum track sound as natural as you would hear when these drums are played live.
Often in the very beginning of working with drums, we use a slight saturation. We put pre-amp and slight distortion (tape emulation) to separate elements.
Snare
We apply the same approach as for the kick drum.
We use an envelope first. The important thing to remember when using envelope is to mind not accented sounds of the drums – the slight hits, ghost notes. So when we use gates we should keep ghost notes in mind and not cut them off.
Then we use equalization and compression. But compression shouldn’t be too strong, because a lot of extra sounds get into the snare mic, especially high-hat.
 Tom
Tom
We work with the tom or floor tom the same as with kick drum and snare. We apply equalizer, compression, and other plugins.
A good tip for working with toms that we often use in our work, is to apply tape saturation on toms. A tape saturation with low speed gives a slight compression and enriches toms very well. We usually set the speed parameter on the tape machine for 7,5.
Drum overhead mic
The overhead mic captures the sounds of the whole drum kit. It shouldn’t be processed much. We usually add gentle saturation and gentle compression. A slight equalization will always work to cut the low end.
We also check the harsh frequencies around 3kHz where hats are, if they are too noisy we may bring them down a little.
We also often use sidechain compression on the overhead with the input from the snare mic track to have more control over the overall snare sound in the mix.
We do it because we create the desired snare part using its personal mic track. But the snare is also present inside other mics and, most of all, in the overhead mic. If we don’t deal with it, the snare sounds will be layered on top of each other in all the tracks and the output will become different from what we designed. That’s how we may lose control over the snare.
So we use a sidechain, and when the snare hits, we attenuate the overhead for this short timespan. It’s short, there will be no audible ducking effect on the overhead mic.
Drums room mic
This is the mic that captures the whole drum kit from the listener’s position. It’s usually processed very little, almost left as is. However, there are two reasons why a mix engineer may want to edit it.
First, if there is a room resonance that needs to be dealt with. Usually, it is in low-mids, around 200 – 500 Hz.
Second, depending on the requirements for the sound qualities of the mix, if we need wide and full sound, we can compress the drum room track. Then the drums will become more powerful and wide, with longer sustain.
Process drum tracks together using a drum bus
After working with individual tracks separately, we route all the drums to a drum bus and add some tape emulation to it.
We also may apply a little drum compression to settle the dynamics of the drums altogether.
 Mixing bass guitar
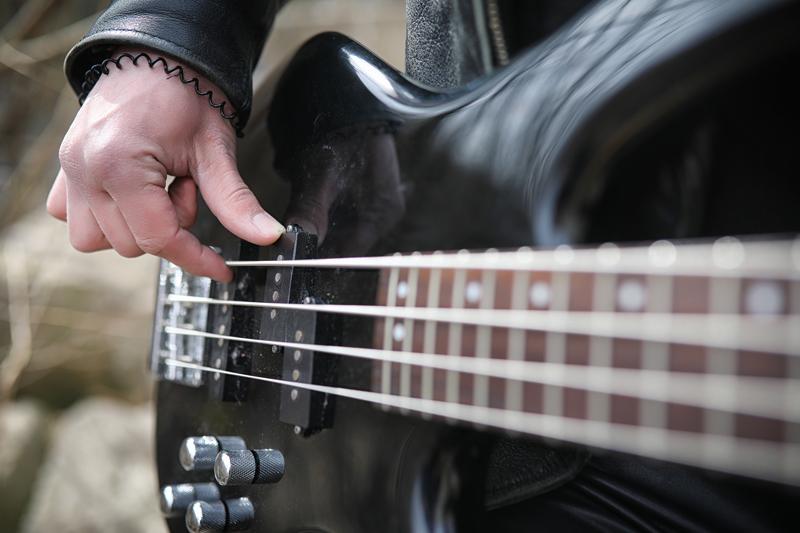
We usually heavily compress the bass. After that, it becomes very low on dynamics, however, it then sounds even more modern and impressive. And we cut the high-end for bass because there is a lot of bleed in those high frequencies and they are not significant for bass.
We also put multiband sidechain compression on bass with kick as an input, so that when kick hits, the low frequencies of the bass would be attenuated to prevent phase and frequency conflicts.
Process drums and bass together
After we have finished working on drums and bass guitar, we route drums and bass into one bus and add some limiter there. This will help us at the mastering stage because usually live drums are very dynamic and to get a loud master record, it’s better to cut their peaks well before mastering.
We don’t want the master record to sound drastically different from the mix, that’s why we take care of loud peaks at the mixing stage, and mix tracks keeping in mind the final loudness requirements for release.
Mixing all the instruments
Accompaniment instruments like pianos, acoustic guitars, and all the others are mixed according to the song. We can not give one general recommendation on how to mix them. Every instrument is different, their parts are unique and the mix engineer needs to judge according to the shape and groove of every particular project.
The only rule here is to try and apply as little processing as possible. Band recording must sound like live music, which is natural.
So some EQ, a little compression, and a little reverb should usually be more than enough.
Amateurs often tend to overprocess these tracks. As a result, they get instrumental parts that don’t work well together with the other tracks. Overprocessed instruments will conflict with their sound in the room mic, which will not be good.
So, keep it simple, and try to leave the accompaniment sounding as natural as possible.
Mixing vocals
Recording artists performing on stage, often using a dynamic mic, with spill in the mic from the accompaniment and drums, usually creates some issues in the recording.
 Plosives
First are pops or plosives, they’re the volume spikes that occur when the singer is too close to the mic. The sound is produced by singing letters P, B, K, and others, and is like someone is tapping on the mic. You will have to eliminate the plosives in vocals using a low cut, or special plugins like, for example, RX 10 De-plosive.
Compression and EQ for vocals
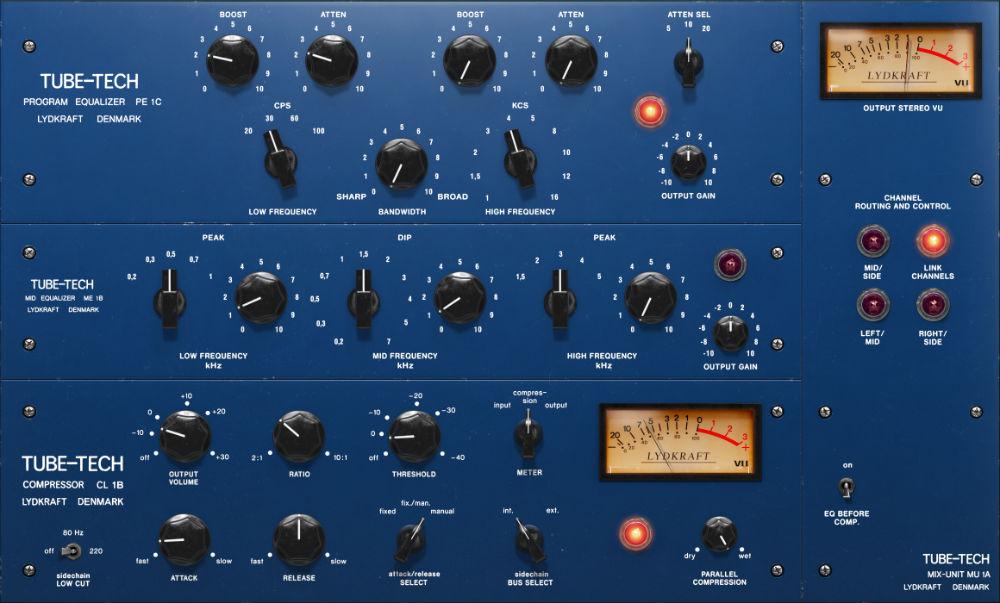
The second feature of a live vocal is its high dynamics. The vocal track will require a lot of compression to become big and loud in the mix.
The EQ rule for vocals in a band recording is that you must be very careful with amplifying the high frequencies. There’s always a lot of bleed in the artist’s mic and especially the hats will get in the high mids. When you compress the vocal, all the bleed will be amplified as well. This may break the shape of the hats you have already created while mixing drums.
Band room mic track
You can treat it as the drums room mic. If we need the sound of the entire mix to be big and powerful, we would compress this track. If we need a natural dynamic live sound, we basically leave it as is.
Trust professionals with your live band mix
The work of a mixing engineer is not easy. It requires experience, knowledge of the industry and the latest trends, and excellent mixing skills.
As we already mentioned earlier, working with a live band recording is one of the most difficult tasks for a mix engineer. There are a lot of nuances with phase issues and bleeding that can not be explained in a short article, but an experienced engineer can handle them.
In our Major Mixing studio we mix and master a lot of band recordings from pop, hip-hop, rock music, and other genres all the time. We know the important details of how to mix a live recording to meet the highest music industry standards. We make it sound dynamic and loud, impressive and professional.
In today’s world, your band needs the best-sounding recordings possible for impressive audio releases and music videos. You need to be the best, otherwise, the competition will steal your fan’s attention.
Use the experience of professionals and create your hit records with us, we care about your success!
Contact us now, we’ll be happy to help!


