At our Major Mixing mixing and mastering service we get a lot of questions about the recording process. Artists often ask us how to record vocals at home and whether they can reach industry-level quality recording without a recording studio.
The answer is, yes, but you’ll have to install a DIY vocal booth at home.
In this article, we’ll suggest several ways of creating a vocal booth design and explain how you can make it yourself. We’ll explain which way is the best and why.
But first, let’s answer some questions that artists often ask about recording vocals at home:
Popular questions about recording at home
It’s worth noting that recording at home is not something only beginners do. You’d be surprised to learn how many famous singers actually record their vocals at home.
Can I record my vocals in any room?
The sound that a singer produces must hit the microphone only once, the same sound shouldn’t reflect and come back to the microphone again.
The worst setting, in this case, is empty rooms with hard walls made of stone or covered with tile. This is where the reflections are the strongest. This is why we sing in the shower and admire breathtaking acoustics in cathedrals and caves.
Rooms with carpets, soft furniture, and full of objects, on the other hand, absorb sound, and we can’t hear much reverb in them. However, these rooms may still create lots of reflections your microphone will capture.
For acoustic treatment or creating a vocal booth, we can use thick soft things like foam panels, mattresses, blankets, and carpets.
Why record a vocal without any room reverb?
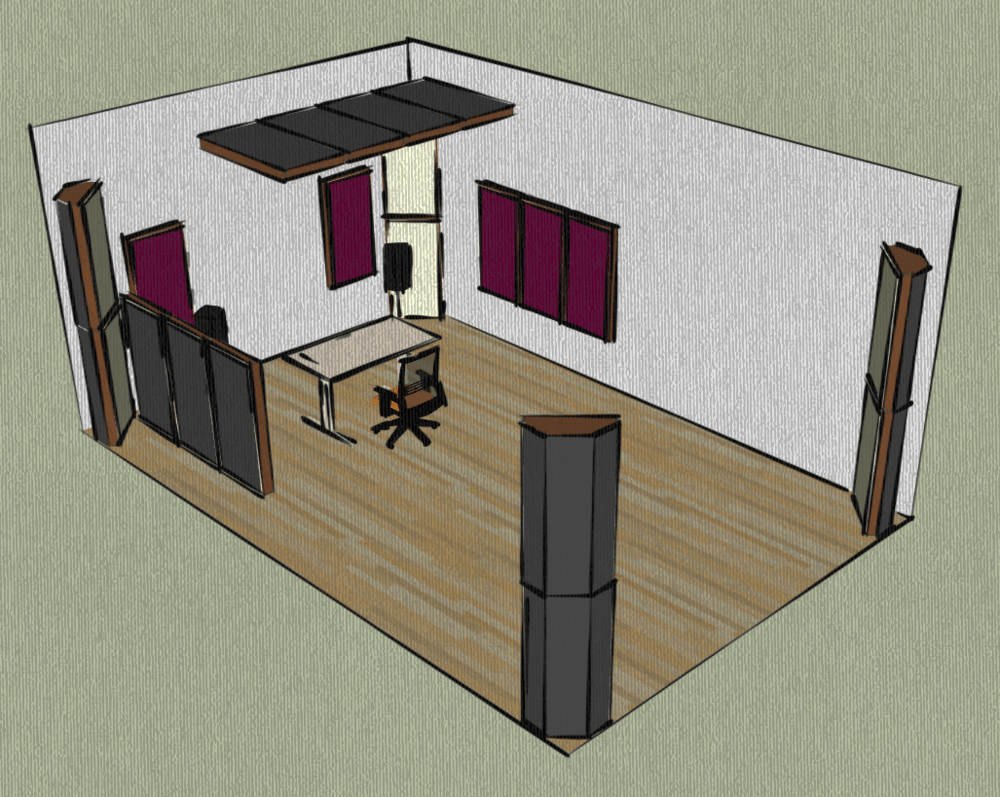 Really, isn’t acoustics great? It amplifies the vocal sound, making it richer and stronger, right? That’s true, however, for mixing a vocal in a song, a mix engineer needs to receive a dry sound, without any reverb, and with no room sound or room acoustics added to it.
Besides, when sound reflections get to the microphone, it’s not a clear reverb, it’s a bunch of late and early reflections. All this creates muddy sounds, different noises, etc. These extra additions to the vocal recordings are almost impossible to get rid of later at the mixing stage.
When a mixing engineer starts to work with such a recording, the effects they may need to add to the vocal will most often amplify these unwanted sounds and reflections, making the vocal sound even muddier, and they face a disaster.
Mixing engineers know how much and which acoustic effects the vocal needs for each song, and those effects are added to dry sound using plugins, and then the vocals sound professional.
To be mixed properly, the initial vocal recording should be clear, without any reflections. And with mixing, the singer’s voice in a song gains effects but only those that are needed and as much as needed.
Do you need a booth to record vocals?
Yes, if you intend to record your vocals at home, you definitely need a vocal booth or a sound-treated room, or both. Without a prepared place for recording, you’ll not be able to produce a good, industry-level vocal track.
There are exceptions, of course, and sometimes people do record a vocal with environmental reflections, but those are only a few cases. Most of the songs in the music industry are made with a vocal track recorded in a special recording studio, a room with acoustic treatment, or a vocal booth.
How much would it cost to build a DIY vocal booth?
Compared to other equipment for musicians, a DIY vocal booth is a very inexpensive component that will bring you professional quality.
Virtually the cost for you may start from nothing and go up to as much as you’d like to spend on it. But in general, $200 will be enough to build a great vocal booth.
Do DIY vocal booths work?
You’ll have to put some effort into it, but with a little money and work you can finally have a good functioning DIY vocal booth for making professional recordings.
So, as you see, DIY vocal booths are worth trying. Keep reading and you will learn how you can easily create one.
Want a free test mix of your track?
We get it.
That’s why we’ll do a full hybrid (analog + digital) mix of your song —
for free.
No upfront payment. No risk.
You only pay if you’re blown away. And if you are, we’ll slash 40% off the final price.
Nobody else in mixing and mastering offers this.
Why?
Because most studios say yes to every project. We don’t. We only mix what we’re excited about — so send us your best track. If we like it, we’ll mix it like it’s going to the Grammys.
👉 Just drop your name and email to get started.
Step 1 . Choosing the room for vocal recordings
First of all, you need to choose the room for sound recording. It can be a big room, build a vocal booth and place it in the middle of the room. This booth can be portable, which is a good thing.
Choosing a closet as a DIY recording booth
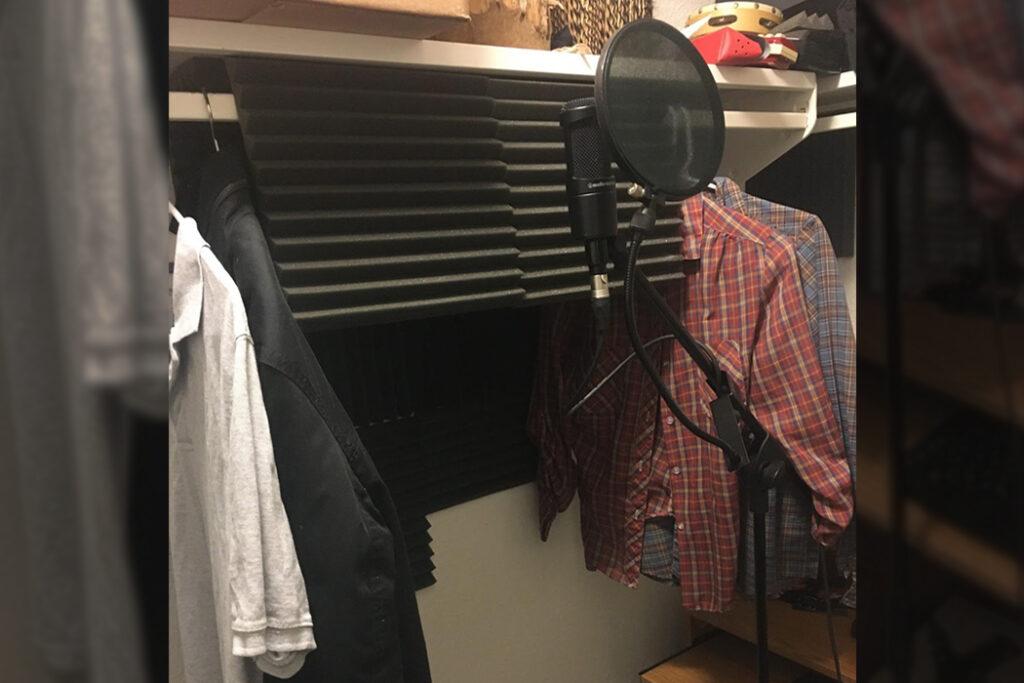 This is where the majority of people make a mistake, because they understand a vocal isolation booth as a tiny room in which the walls are sound-treated. They wind up choosing the smallest room, like a bedroom closet to use for recording vocals. It’s a popular idea to build your own recording booth in a tiny closet. But, despite the common misconception, this is not the best way to do it.
Let’s remember that the point of creating a place for recording is to eliminate all possible resonances. But the smaller the room, the more intense those resonances will be, and the more difficult it will be to eliminate them.
Some people, however, still prefer to prepare a small acoustically treated room and record there. The advantage of these booths can be less wall space to work with.
The disadvantages are the inconvenience of working in a very small room or a closet booth, and a sound quality that is still worse than when you use a spacious room.
Placing a DIY vocal booth in a spacious room
On the contrary, when you use a big room and place your sound booth in it, the reflection from the walls is much milder, and there is a delay between the sound and the reflection. At the same time, traveling through the room, sound reflection loses a lot of energy.
So, it’s perfect if you have at your disposal a huge room or a big garage. Of course, you’ll need to put some work into installing sound-catching obstacles, but as a result, you’ll get your perfect recording place.
Best materials to trap sound waves
 Which materials or things can help you sound-treat your room for recording a vocal and build a DIY vocal booth? They will be the materials that can make a good obstacle in the way of sound and will not reflect the waves back.
Blankets
The easiest and cheapest way is to use things you already have in your household like blankets. Choose the thickest blankets you can find.
Acoustic blankets
Instead of regular thick blankets, you also can purchase and use several acoustic blankets. In this case, pay attention that you want sound-absorbing blankets and not soundproofing ones.
Soundproofing blankets have an outer layer of air-tight material like vinyl or foil, they act like a barrier for sound waves.
On the other hand, acoustic blankets dampen sound waves. The waves travel inside sound-absorbing acoustic blankets, and the material traps sound inside.
Mattresses
Mattresses are the best sound traps, especially memory foam ones. Memory foam mattresses work great. They absorb reflections of the high and the low frequencies equally well. Most vocal booths made from mattresses trap sound very well.
Mineral wool and fiberglass
 Great material for room sound isolation is mineral wool (also called mineral fiber, stone wool, or, referring to a brand name, Rockwool). Mineral wool DIY acoustic panels can be a wonderful professional acoustic treatment for your recording room and the material you build your own vocal booth with. Mineral wool attenuates both high and low-frequency sound waves and absorbs reflections pretty well.
Instead of mineral fiber, fiberglass can also be used, but its soundproof qualities are a bit lower.
Acoustic foam
Wouldn’t acoustic foam do better? No. This is because acoustic foam usually deals well with frequencies higher than 1kHz. Lower frequencies, unfortunately, will still appear in the reflected waves in some form that acoustic foam fails to trap. So the low-end reflected waves will still interfere with the recording if you only use acoustic foam. We don’t recommend using it for a DIY vocal booth for professional recordings, even thick blankets in this case will work better.
So, to recap, the best items to build a DIY vocal booth that we recommend are mattresses and acoustic panels made of mineral wool.
Step 2. Building a booth for vocal sound recordings
A vocal booth is basically a sound trap set around the singer. They can be set permanently if you are recording often in the same place and don’t mind the construction taking up some space.
Vocal booths can also be made mobile and portable, in this case, you will assemble and disassemble your recording place whenever you like.
 Option 1. Frame and blankets.
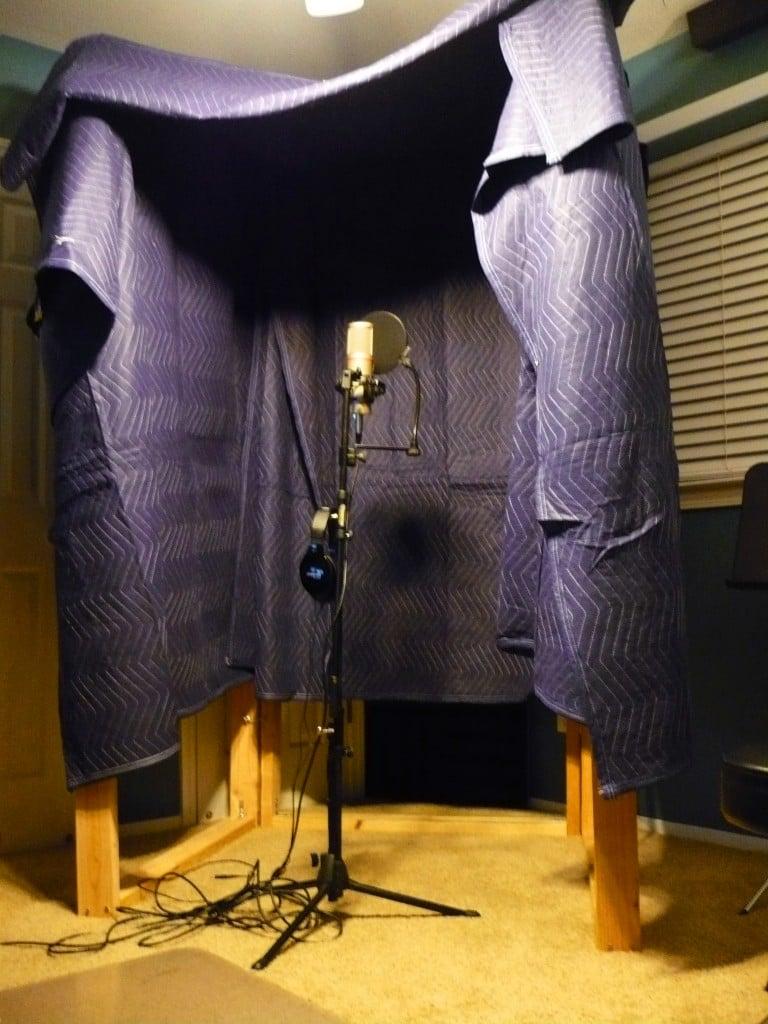
The cheapest way to make a vocal booth would again be thick blankets hanging on a frame or on ropes around the singer. Acoustic sound-absorbing blankets would do as well for a blanket booth.
A blanket booth is a portable vocal booth, easy to make, and inexpensive.
Although a blanket booth is not the most effective sound trap, it’s the first step to professional recording.
Option 2. A mattress fort
If you can get a few mattresses, that would be the best solution.
You can arrange them as three adjacent walls or a 4-wall closed mattress vocal booth. Either way you’ll have to think of some frame that will hold the mattress booth in place and keep it from falling.
In the 3-mattress booth case, the singer can be placed so that the mattresses are in front, and to both sides of the singer. In this case, the mattress booth will catch the sound as the artist is singing and stop them from traveling across the room. This is what we usually recommend artists do.
Some people, however, place the mic stand towards the opening, and the mattresses will be from the back and to the sides of the singer. The mattress vocal booth then will catch the reflected waves not allowing them to reach the microphone.
In the case of 4 walls, the singer will be surrounded by mattresses, and this will eliminate the reflections from all sides.
If you build a mattress fort, you don’t need anything else. From our experience, this is the best functioning sound booth you can create at home, and the recording quality will be enough to create a great record to compete in the music industry.
Option 3. DIY mobile recording booth from mineral wool
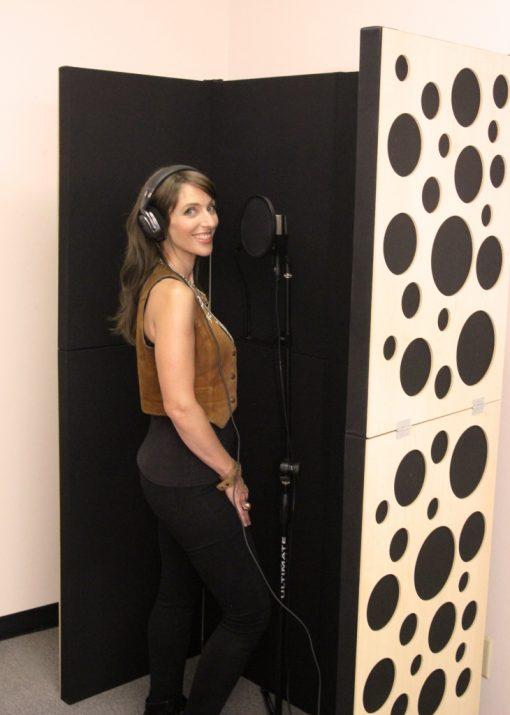 The smart solution will be to build good large panels using mineral wool and wood. For this, you can make a wooden frame like a wide long box 2-5 inches deep. The bottom of the box can be made of fabric, wood, cardboard, or other material. After that, you have to fill the frame with mineral wool and then cover the wool with fabric that will not allow the wool dust to get out into the room.
After the board is ready, you can cover it with any pretty decorative fabric you like. These boards are ideal to sound-treat walls in your recording studio or to build a DIY vocal booth.
Note that for the best effect, you should not choose a fabric that is completely air-tight. Such fabric will not trap sound well, or may even reflect them.
If you make three or four such boards about 2 meters high, and about 1,5 meters wide, and make them with wooden legs that they will stand on their own, you have built a portable vocal booth. Attach small wheels to them and you will be able to move them around your studio and set up a recording place wherever and whenever you like.
The huge advantage of this method is not only the mobility and convenience. The point is that it’s a very effective professional equipment which you can make from relatively cheap materials. It will just take a little of your time and effort and you’ll receive a piece of very functional equipment that you will be using for 10+ years. So it definitely pays off to make it.
What about a reflection filter?
Additionally, we have to mention here reflection filters. They are ready-made, small, and can be attached to a stand and placed in front of a singer. This solution, no matter how pretty it looks, is just a small addition to a sound-treated room. By itself, a reflection filter will not protect your recording from all the sound reflected from all the objects and walls around you.
Should I treat the room for sound if I have a vocal booth?
If you have built a good vocal booth, acoustic treatment for the room it’s placed in for sound is not necessary. However, the point of all this work is to catch all the sound waves and not allow them to be reflected off anything. Hence, the more, the better.
If your budget allows that, and you have time, treat the room for sound as well. This way you’ll eliminate the room reflections. If you haven’t done so, you might need a home studio anyways. You can acoustically treat the walls of your home studio and build a mobile booth at the same time.
Step 3. How to eliminate room sound reflections
If you want to treat the room for sound, you can use the same materials and things we discussed. Blankets, mattresses, panels with mineral wool, and acoustic foam.
You should pay the most attention to the areas on the walls around the level of the singer’s head. Windows and doors, of course, count as well.
You may treat all the walls, or just three of them: in front of the singer, and on both sides.
The carpet on the floor would be a good addition to your recording studio, it will catch some sound as well.
Blankets on the walls
If you use blankets, the easiest way will be to hang them along the walls. The more, the better, but definitely make sure to cover the walls on the level of a singer’s head.
As we said, use the thickest blankets you can find. Leave some space between each blanket and the wall. You may stretch ropes along the walls and hang blankets on them.
Mattresses or acoustic panels on the walls
Mattresses or mineral wool panels will work well too. You’ll need to set or hang them along the walls.
Mix engineer is your best friend
At our Major Mixing mixing and mastering studio, we mix songs of different styles and genres. And to create a winning mix that can go up in the charts, all tracks should be recorded well, especially the vocals.
For some songs, the vocal needs to be mixed very upfront, close to the listener. Then it will be more narrow with very little reverb. For other songs, the vocal part will be mixed less dry, with more reverb, and hence, sounding from a distance to the listener and wider.
We are professionals at this and know how to create a modern, impressive song from your vocal recording and instrumental tracks.
If your song is going to become popular, it will require professional mixing and mastering. Amateur mixing does not count in the music world today.
We’ll create an industry-level mix for your song, and the impressive master record ready for release. Contact us, we are interested in your success!


